

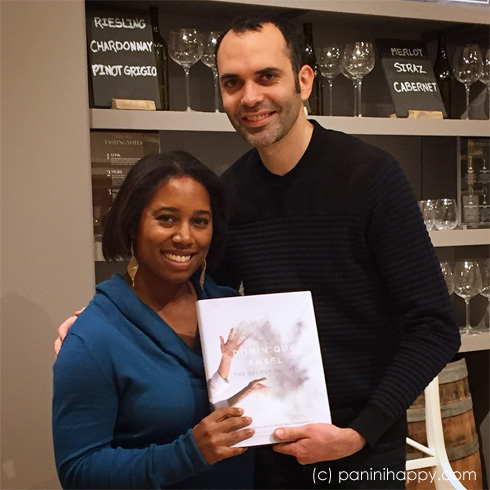
I expected I’d leave Dominique Ansel’s book signing eager to try my hand at making his famous Cronuts™, but I ended up feeling a bit inspired to bake my way through his entire cookbook, Dominique Ansel: The Secret Recipes. It’s not that I can handle all of these desserts in my house (although, I’m not bothered by this prospect) but I feel like by the time I work through all of the incredible technique that Chef Ansel handholds you through in great detail I won’t just know how to pull off these showstoppers…I’m going to be a way better baker.
These Mini Me’s (aka mini meringues) came from the section of the book designated as “Beginner Recipes”. I would say the recipe is easy but you have to be comfortable with a few not-quite-beginner techniques, such as separating eggs, whipping the whites to stiff peaks and maneuvering a piping bag.
Don’t be deterred by how long this recipe looks — it’s just detailed! Chef Ansel walks you through the process, offering a ton of helpful tips. At the end of the day, it’s just two simple ingredients — egg whites and confectioners’ sugar — plus any flavorings or colors you might want to add. I spiraled in some blue food coloring for a treat for my daughter’s “Frozen” birthday party — they were a hit!
- 2¼ cups (266 grams) confectioners’ sugar
- 4 each (120 grams) large egg whites
- ½ teaspoon (1.5 grams) ground cinnamon
- Zest of 1 grated lemon
- 1 teaspoon (5 grams) peppermint extract
- Preheat the oven to 200°F (95°C) for conventional or 175°F (80°C) for convection.
- Fill a medium pot with about 3 inches (about 7.5 cm) of water and bring to a simmer. Combine the confectioners’ sugar and egg whites in a medium heatproof bowl (the metal bowl of a stand mixer is fine) and place on top of the pot of simmering water. The bowl should sit on the rim of the pot, well above the water.
- Whisk the egg white mixture constantly as it warms. When it reaches 113°F (45°C) and feels hot to the touch, remove from the heat.*
- Using a stand mixer or hand mixer fitted with a whisk, whip the egg whites on high speed. As they whip, the egg whites will triple in volume, thicken and cool. When finished, the meringue will be very fluffy and hold a medium-stiff peak. This should take about 5 minutes, depending on your mixer.±
- With a rubber spatula, gently fold the desired flavoring into the meringue. Feel free to separate the meringue into batches and use different flavors. Just make sure you keep all tools clean for each to avoid mixing them.‡
- Cut the tip of a piping bag to snugly fit a #804 plain tip. Using a spatula, place 2 large scoops of meringue in the bag so that it is one-third full. Push the meringue down toward the tip of the bag.
- Line a sheet plan with parchment paper. At each corner, pipe a small dot of meringue under the parchment and push the parchment flat. This will help keep it “glued” to the sheet pan.
- Holding the piping bag at a 90-degree angle about ½ inch (1.25 cm) above the sheet pan, pipe a dot of meringue with steady, even pressure until it reaches the size of a dime. Pull the piping bag straight up to create a fine point. (You should have a meringue teardrop shaped like a Hershey’s Kiss.) Repeat piping drops about ½ inch (1.25 cm) apart until all the meringue is used, refilling the piping bag as necessary. (You might need to use a few sheet pans, depending on the size of the Mini Me’s.)
- Bake the meringues for 20 minutes. Rotate the pan 180 degrees and bake for 20 minutes more. Continue to rotate every 20 minutes until the meringues are completely dry, about 1 hour 20 minutes. The Mini Me’s should be crispy all the way through.
- Transfer the Mini Me’s, still on the parchment paper, to a wire rack to cool completely. When cool, remove gently from the parchment with your fingers.
STORAGE INSTRUCTIONS: Mini Me’s can be kept in a closed airtight container at room temperature, away from humidity, for up to 1 week.
* This kind of meringue, in which you dissolve the sugar in the egg whites over heat before you whip them, is known as a “Swiss meringue.”
± Don’t worry about overwhipping the meringue. It won’t affect the final outcome of the product, so better to overwhip than underwhip. When making meringue, it is very important to use clean tools. If a drop of oil (or other fat) or egg yolk gets into the egg whites, the meringue will not whip properly.
‡ The more you work the meringue, the looser its structure becomes. When it bakes, a loose meringue will become flat and dense. It is very important to be as gentle as possible at this stage. When choosing flavorings, pick ones that are very concentrated. Ground spices, alcohol-based extracts, and citrus zests are all good options. You can also add a drop of natural food coloring to your Swiss meringue to create colored Mini Me’s.


Leave a Reply